How To Setup Your First Noipfraud Client
🚫 If you are not using Digital Ocean or Vultr, or need to install on an existing server, then do not use this guide. Instead please refer to the advanced guide here.
This guide is to help you with a simple way to get your first install of noipfraud live without having to use ssh or use FTP. You must use one of these webhosts Digital Ocean or Vultr
Depending on the host you choose select the correct guide below.
Digital Ocean Guide.
You can signup for digital ocean here. You will get some free credits from them.
Once signed up and logged in > Create droplet
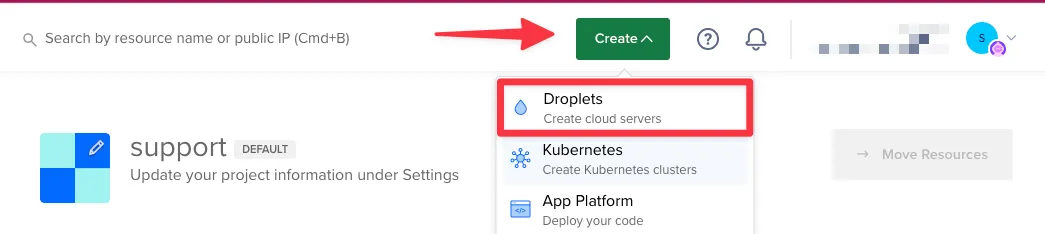
From the next page select these options below:
”Choose Region” > Pick region close to where you plan to advertise. If you want to run ads in the USA select a location based in the USA.
”Datacenter” > use the default
”Choose an Image” > OS > Ubuntu > Choose one of the versions listed here. The version does NOT matter, but if unsure just stick with the default.
”Choose Size” > Droplet type: Basic > CPU options: Regular > Min Spec is 1GB / 1 CPU / 25 GB Disk
“Choose Authentication Method” > Password > Set a strong password you will remember
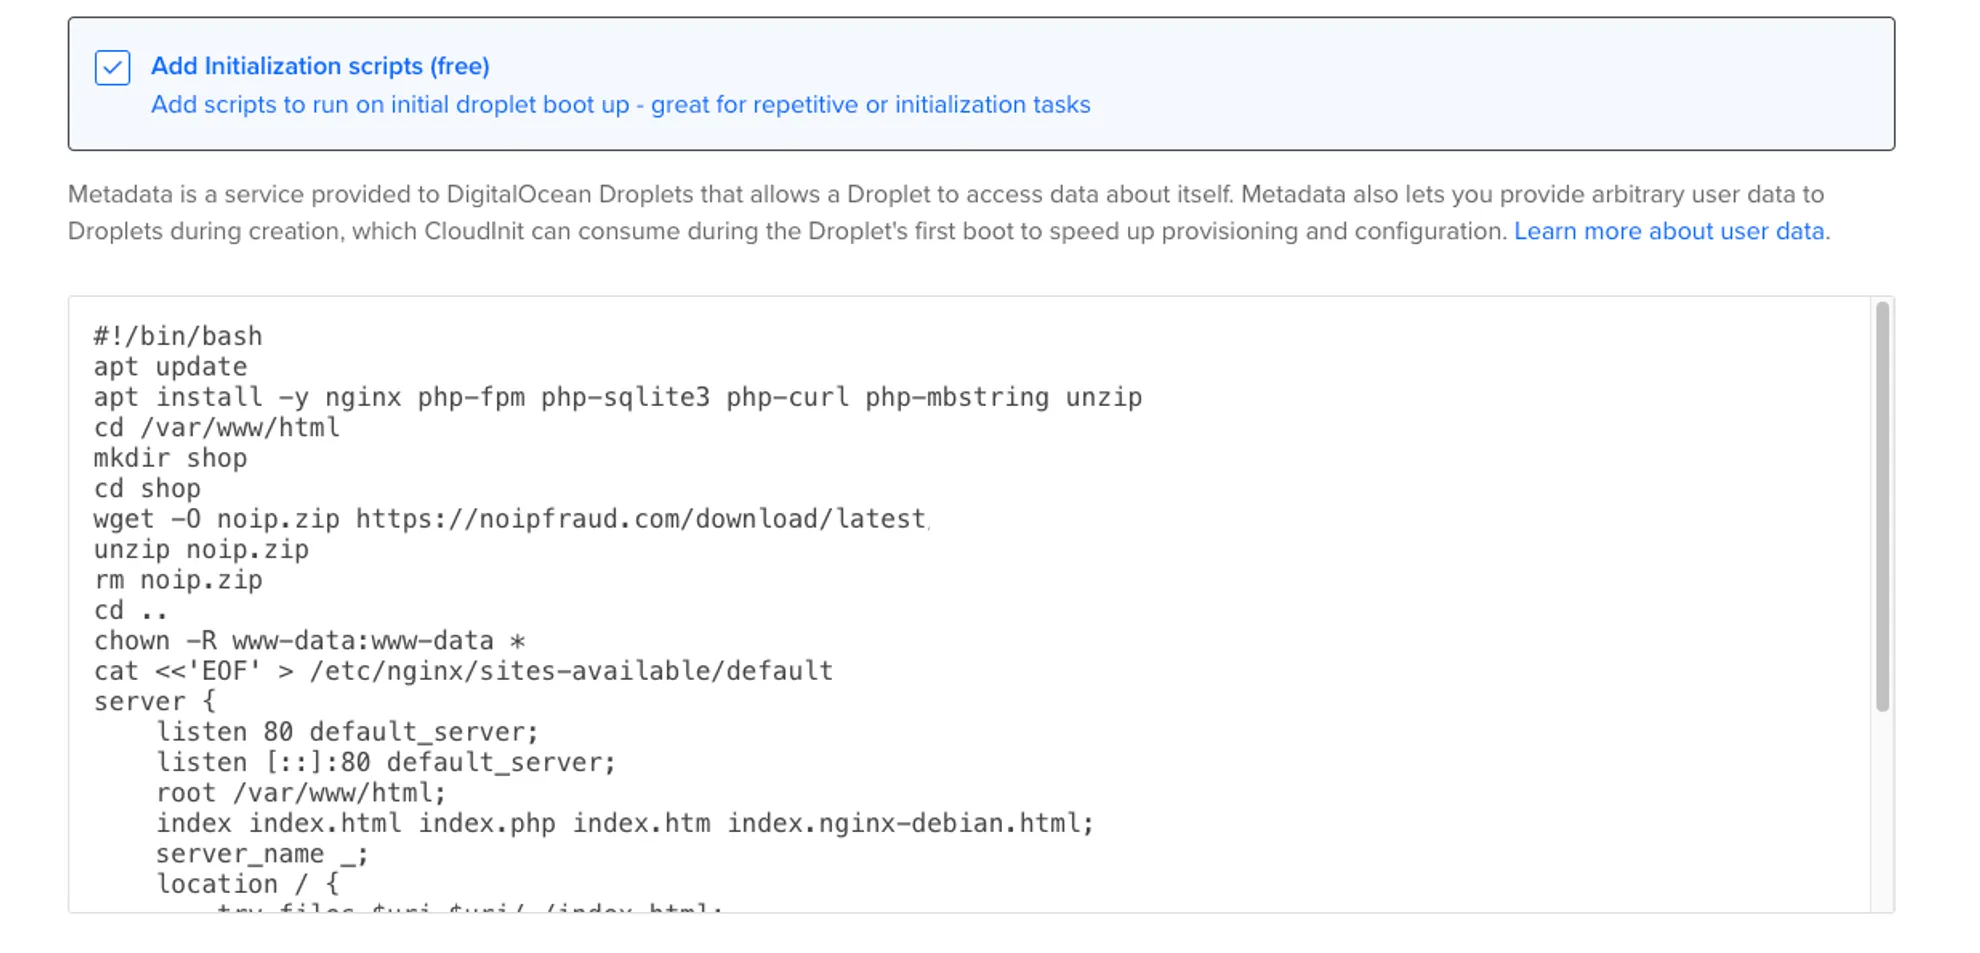
”Advanced Options” > enable the two selections: “Enable IPv6” and “Add Initialization scripts”
In the textbox that opens, copy and paste the code below:
#!/bin/bash
apt update
apt install -y nginx php-fpm php-sqlite3 php-curl php-mbstring unzip
cd /var/www/html
mkdir shop
cd shop
wget -O noip.zip https://noipfraud.com/download/latest
unzip noip.zip
rm noip.zip
cd ..
chown -R www-data:www-data *
cat <<'EOF' > /etc/nginx/sites-available/default
server {
    listen 80 default_server;
    listen [::]:80 default_server;
    root /var/www/html;
    index index.html index.php index.htm index.nginx-debian.html;
    server_name _;
    location / {
        try_files $uri $uri/ /index.html;
    }
    location ~ \.php$ {
        include snippets/fastcgi-php.conf;
        fastcgi_pass unix:/run/php/php-fpm.sock;
    }
}
EOF
systemctl restart nginx
It should look like this
”Hostname” > name it whatever you like
Click “Create Droplet” Button
You now will need to wait while it builds the droplet. Please note that while digital ocean interface may say the droplet is completed or ready. The install scripts need to finish so its best to wait 5 minutes or so to the server is fully deployed.
Once the 5 minutes have passed then visit your Droplet server IP in a browser as seen in the example below (please note the IP is available in the Digital Ocean interface)
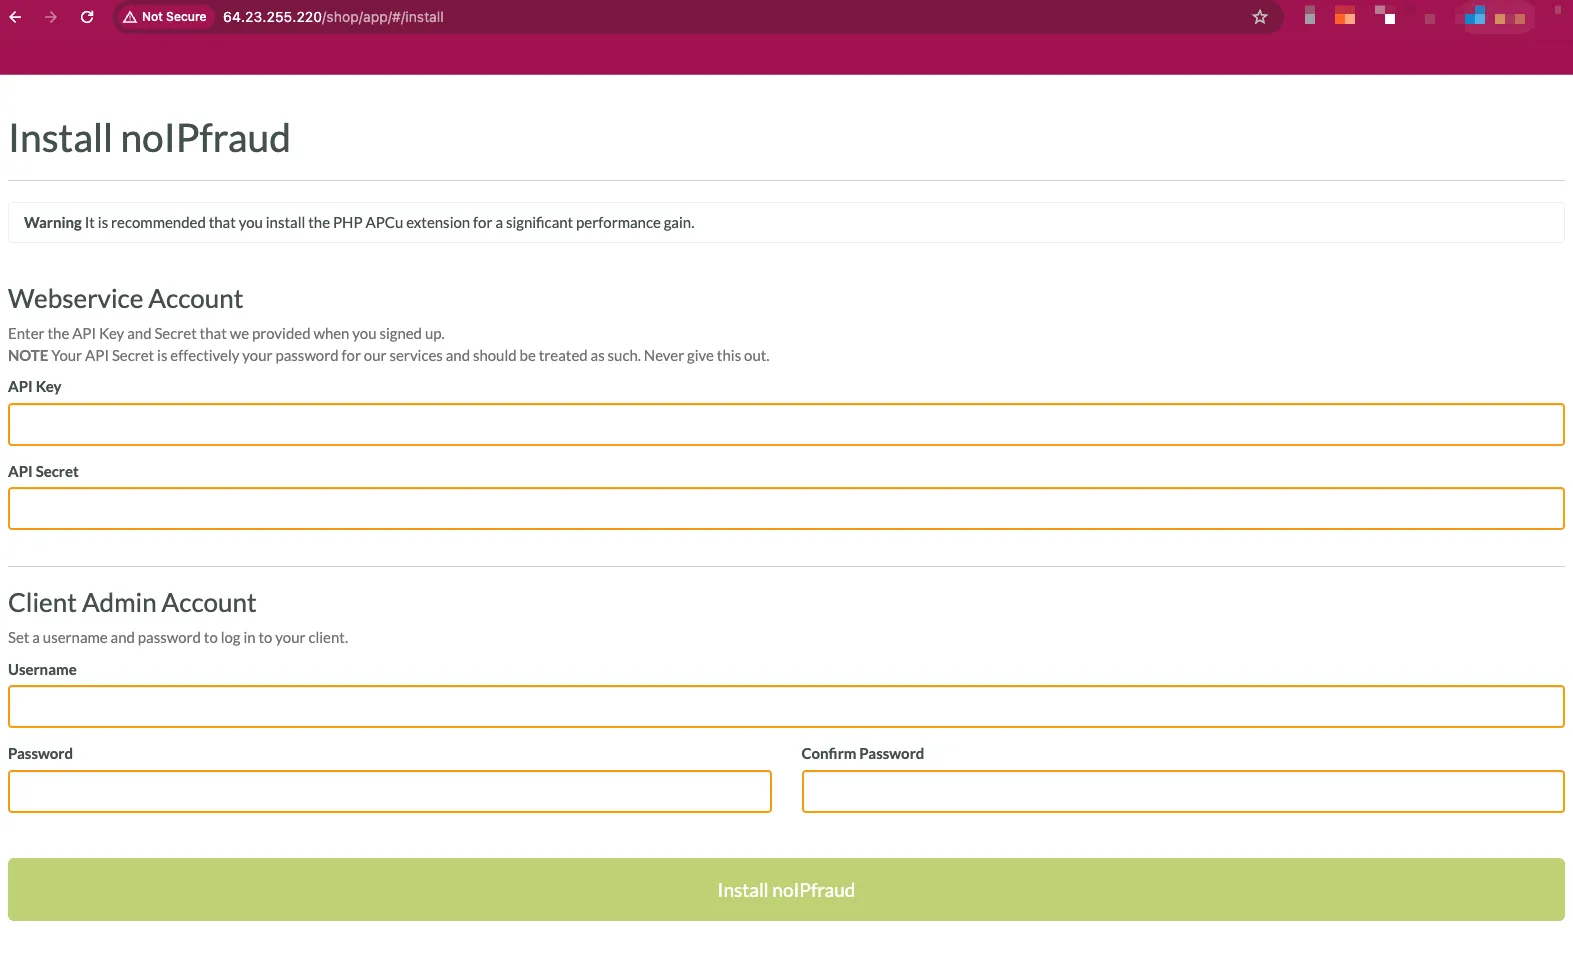
The format is http://your-server-ip/shop/app
You would then enter in the api details you received via email, api key and api secret
Then you set your username and password these can be anything you choose. They are unique to this specific install.
HOWEVER please take note of what you place here as we have no way of knowing what you has set as your username and password
Next step would be assigning a domain to that server via Cloudflare or whatever DNS you wish to use.
Here is a guide of how to setup Cloudflare with a domain bought at namecheap.
make sure to add an DNS “A Record” for your domain with this droplet/server IP - here is their guide
You MUST use a domain with your install
You have completed you first install woot woot!
Vultr Setup Guide
You can signup for Vultr here https://vultr.com
Once signed up and logged in visit this URL to create your new instance
Then select the options below:
”Choose Type” > Cloud compute - Shared CPU
”Choose Location” > Pick region close to where you plan to advertise. If you want to run ads in the USA select a location based in the USA.
”Choose Image” > Ubuntu > Choose any of the versions listed (20 to 24) but use default if unsure
”Choose Plan” > These are the min specs: 1 vCPU / 1 GB / 25 GB Disk(NVme)
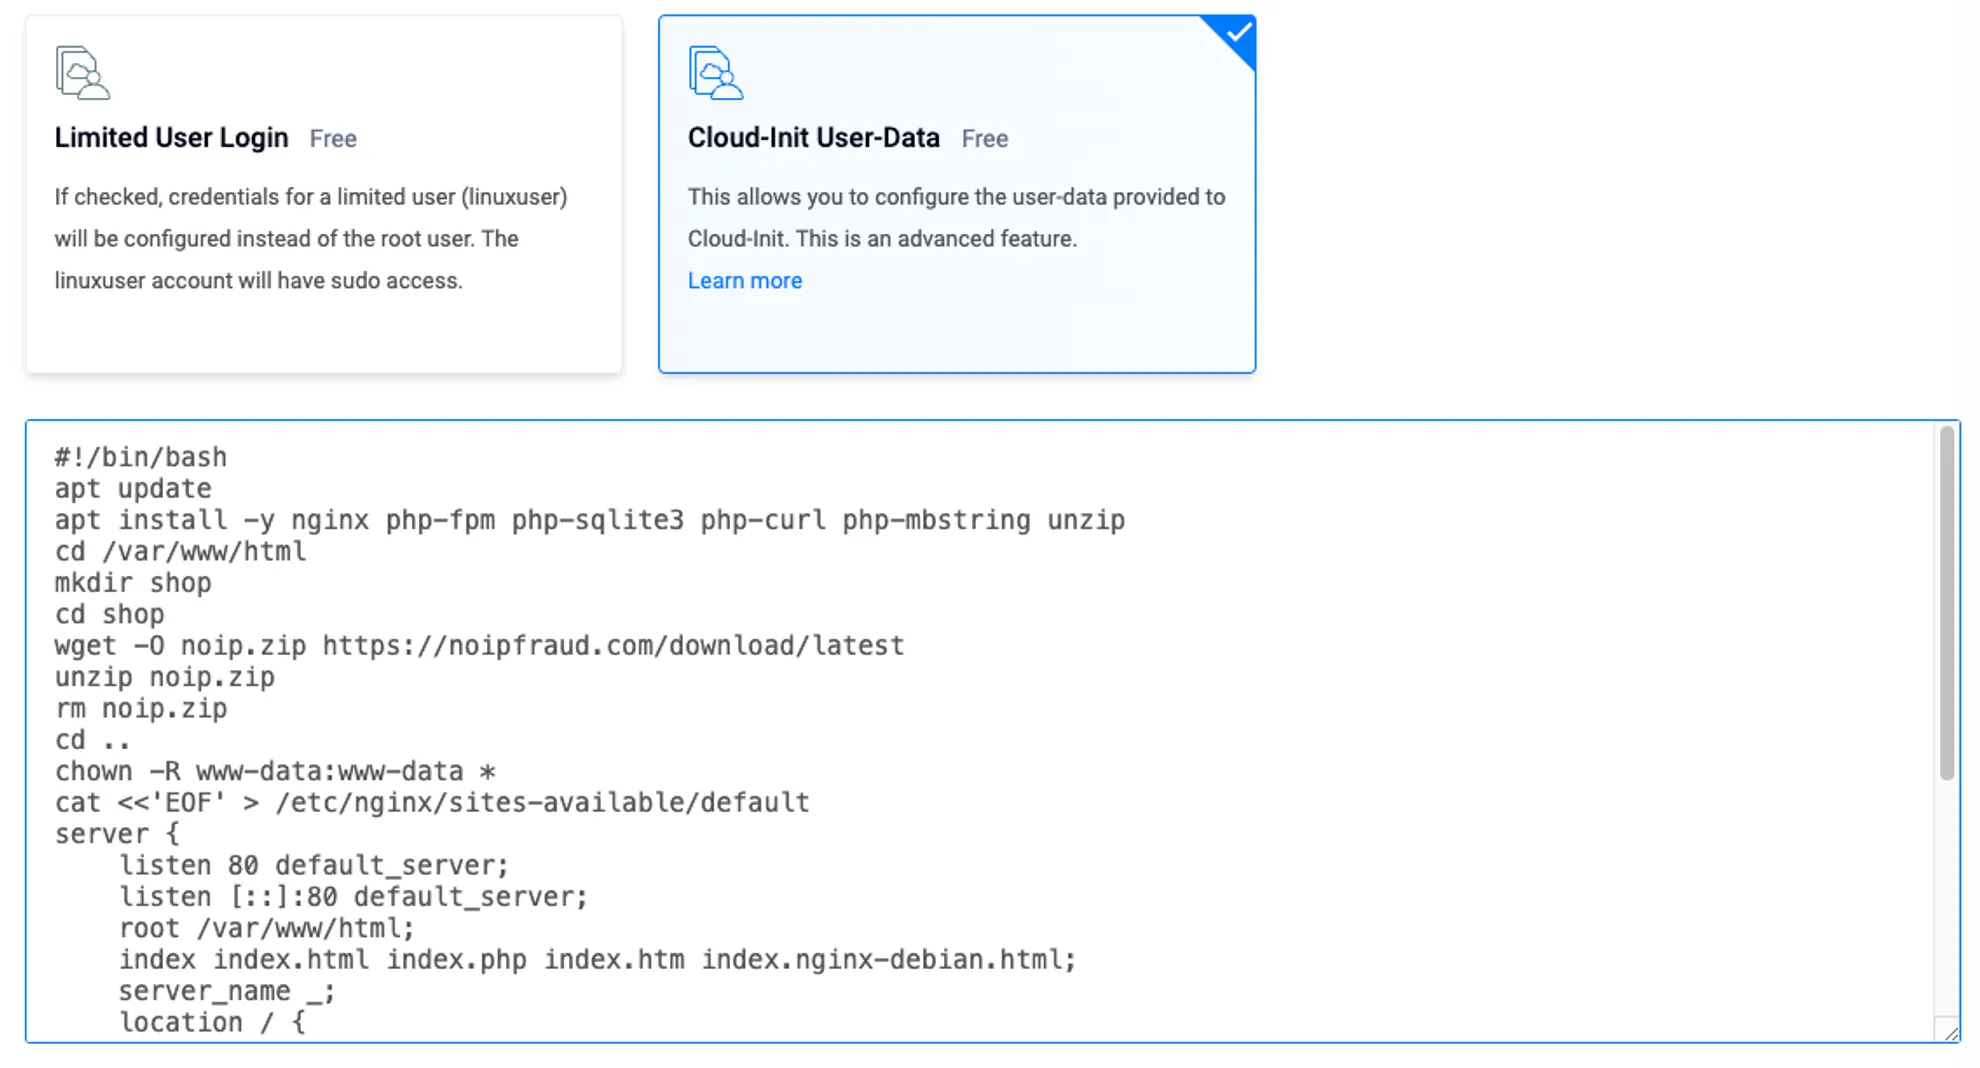
”Additional Features” > Please select : “IPv6” and “Cloud-Init User-Data” (”Auto Backups” is optional but we would HIGHLY recommend it)
In the text box below “**Cloud-Init User-Data”
Please copy and paste the code below**
#!/bin/bash
apt update
apt install -y nginx php-fpm php-sqlite3 php-curl php-mbstring unzip
cd /var/www/html
mkdir shop
cd shop
wget -O noip.zip https://noipfraud.com/download/latest
unzip noip.zip
rm noip.zip
cd ..
chown -R www-data:www-data *
cat <<'EOF' > /etc/nginx/sites-available/default
server {
    listen 80 default_server;
    listen [::]:80 default_server;
    root /var/www/html;
    index index.html index.php index.htm index.nginx-debian.html;
    server_name _;
    location / {
        try_files $uri $uri/ /index.html;
    }
    location ~ \.php$ {
        include snippets/fastcgi-php.conf;
        fastcgi_pass unix:/run/php/php-fpm.sock;
    }
}
EOF
ufw allow http
ufw allow https
ufw reload
systemctl restart nginx
it should look like this
You do not need to configure any more settings just click the “Deploy Now” button at the bottom of the page.
You now will need to wait while it builds the droplet. Please note that while Vultr interface may say the droplet is completed or ready. The install scripts need to finish so its best to wait 5 minutes or so to the server is fully deployed.
Once the 5 minutes have passed then visit your Droplet server IP in a browser as seen in the example below (please note the IP is available in the Vultr interface)
The format is http://your-server-ip/shop/app
You would then enter in the api details you received via email, api key and api secret
Then you set your username and password these can be anything you choose. They are unique to this specific install.
HOWEVER please take note of what you place here as we have no way of knowing what you has set as your username and password
Next step would be assigning a domain to that server via Cloudflare or whatever DNS you wish to use.
Next step would be assigning a domain to that server via Cloudflare or whatever DNS you wish to use.
Here is a guide of how to setup Cloudflare with a domain bought at namecheap.
make sure to add an DNS “A Record” for your domain with this droplet/server IP - here is their guide
You MUST use a domain with your install
You have completed you first install woot woot!